


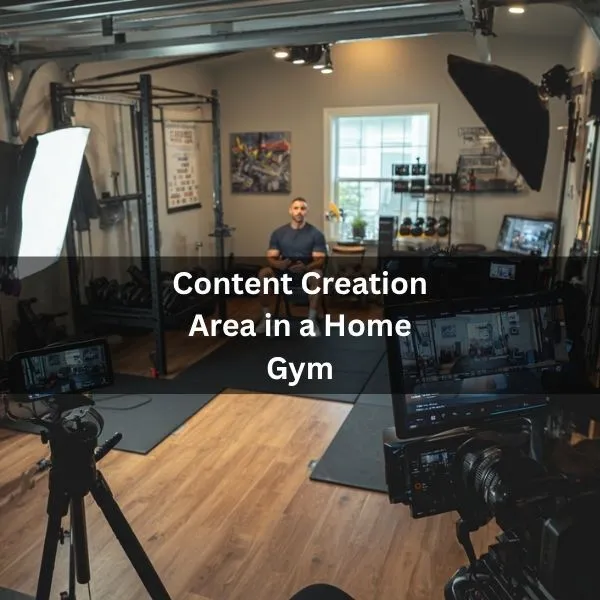
You don’t need a full studio to film in your home gym, but you do need a reliable corner, stable camera framing, and lighting that won’t throw harsh shadows on every rep. Start by choosing a clean, consistent background, then lock in a simple camera-and-tripod setup you won’t bump during the set. Add a key light and a softer fill, clear the clutter, and outline what you’ll say so you don’t ramble because one small mistake can ruin the whole take…
Key Takeaways
- Pick a dedicated filming corner with clear floor space, safe overhead room, and a consistent, distraction-free background without mirrors.
- Use one primary camera with fixed settings and two default angles (front three-quarter and side) for repeatable framing.
- Mount the camera on a rock-solid tripod or rack mount, place it on rubber mats, add weight, and do a quick shake test.
- Light with a 45° key light plus soft fill, avoid mixed bulbs, and lock exposure/white balance to prevent flicker and brightness shifts.
- Keep a clean 6–8 foot backdrop, do a 30-second reset before filming, and script a simple intro, exercise cues, and outro.
Pick a Home Gym Corner for Filming
If you want your workouts to look consistent on camera, start by choosing one dedicated corner of your garden gym room for filming.
Pick a spot you can keep semi-permanent, so you’re not rearranging racks, benches, or plates every session. Aim for a clean background: a blank wall, neatly stored weights, or one branded banner, nothing that visually competes with your movement.
Check ceiling height and floor space so you can press overhead, jump, or lunge without leaving the frame or bumping equipment.
Stand in that corner and rehearse your most common exercises. Make sure you can step in and out without tripping over bands, cords, or mats.
Keep mirrors out of frame if they create distracting reflections. Leave a small “staging zone” nearby for water, chalk, towels, and props, so you don’t clutter your shot.
Choose a Simple Home Gym Camera Setup
Once you’ve locked in your filming corner, keep your camera setup as simple and repeatable as possible.
Pick one primary camera that you’ll use every session, so your framing, focus, and file workflow stay consistent. A modern phone works great if it shoots 1080p or 4K, handles low light decently, and lets you lock exposure and focus. If you use a dedicated camera, choose one lens and leave it there; a wide lens captures full-body lifts without constant repositioning.
Decide on two default angles: a front three-quarter view for most workouts and a side view for form checks.
Set clear rules for audio, too. Either record with a small clip-on mic or stay close enough for a clean voice.
Finally, standardise settings: fixed frame rate, fixed resolution, and the same white balance every time. That consistency makes editing faster, and your clips look intentional.
Pro Tip: Find a camera or use an app on your phone that auto-uploads your videos while you make them. Canon has cameras that allow you to film, finish, and they auto-upload to your laptop or computer.
Use Tripods and Mounts That Stay Rock-Solid
One shaky tripod can make an otherwise solid lift look sloppy, so lock in mounts that don’t budge when the floor vibrates, or you brush past them.
Pick a tripod with a wide stance, metal legs, and a rated load well above your camera or phone. Extend thicker leg sections first, keep the centre column low, and level it before you hit record.
Stabilise placement: set feet on rubber mats, not plates or slick concrete.
Add weight by hanging a sandbag or kettlebell from the centre hook, and route cables so you won’t snag them mid-set. For phones, use a clamp with a locking screw, not a spring-only grip.
When space is tight, use wall or rack mounts: a squat-rack crossmember clamp, a magnetic mount on steel, or a ceiling joist mount.
Tighten everything, then do a quick shake test.
Light Your Home Gym to Avoid Shadows and Flicker
Good lighting makes your lifts look clean and professional, and it prevents harsh shadows and distracting flicker that can ruin an otherwise great set.
Start by turning off mixed sources: don’t combine daylight, overhead fluorescents, and LEDs with different colour temps. Pick one look (daylight or warm) and match every light to it.
Place your key light about 45° off to one side of the camera and slightly above eye level to shape you without raccoon shadows.
Add a softer fill on the opposite side or bounce light off a white wall to lift contrast. If you film with a phone, lock exposure and white balance so brightness doesn’t pulse mid-rep.
To stop flicker, set LED panels to 100% or use high-frequency “flicker-free” lights, then match shutter speed to your power grid (1/60 in 60Hz regions, 1/50 in 50Hz).
Test-record 10 seconds before you lift.
Make Your Gym Background Look Clean Fast
After you’ve dialled in lighting, the fastest way to make your footage look polished is to clean up what’s behind you.
You don’t need a full remodel – just remove visual noise, define one “hero” wall, and keep everything else intentional. Aim for clear floor space, straight lines, and a few repeatable placements you can reset in seconds.
- Clear the clutter zone: Pick a 6–8 foot area behind your lifting spot and move loose plates, bands, towels, and bottles into bins or a cabinet.
- Square your frame: Align racks, benches, and mats parallel to the wall so nothing looks crooked on camera.
- Hide the mess fast: Use a folding screen, curtain, or moving blanket to cover storage shelves and laundry piles.
- Add one clean anchor: Hang a flag, logo, or mirror and keep it centred for consistency.
Do a 30-second reset before every shoot.
Script Your Workout Videos (and Plan Your Audio)
Even if you’re filming a “quick” session, a simple script keeps your workout video tight and makes your coaching land on the first take.
Write a mini outline: hook, warm-up, main sets, cooldown, and one clear takeaway. For each exercise, note cues you’ll repeat (breathing, bracing, tempo) and the common mistakes you’ll correct.
Add exact rep schemes, rest times, and any on-screen callouts so you don’t improvise mid-sweat.
Plan your audio before you hit record. Decide if you’ll talk live, record a voiceover, or mix both. If you’re speaking live, keep sentences short and leave pauses for edits.
Do a 10-second sound check, listen for echo, and kill noisy fans. If music’s included, keep it low and consistent, then capture a clean room tone for smoother cuts later.
Don’t make the mistake of not taking sound seriously. A proper gym needs a surround sound setup to make sure the background music doesn’t distract from your instructions while recording.
Conclusion
Now you’ve got everything you need to turn your home gym into a reliable filming corner. Pick a clean, roomy spot, lock in your camera angle, and keep your tripod rock-solid so shots don’t wobble. Add a key light and a softer fill to cut harsh shadows and prevent flicker. Tidy the background fast, then script your workout and plan your audio. With this setup, you’ll film like a well-oiled machine.
For a setup that works beyond filming, follow the complete home gym entertainment setup guide.